Showing posts with label A5 Planner. Show all posts

Thursday, 10 November 2016

Plan With Me

Today I'm going to be doing another Plan With Me and I really enjoyed making it that I thought I would make another and this time it's in a different planner but the same inserts which are from Filofax and are week on 2 pages as I find it hard to use any other style. My planner is from Paperchase by the way.

This is the 'blank' pages and they do have some page flags (from Paperchase) saying what day certain blog posts are going live so I know to promote them on my social media. There's also a paperclip which is actually from the week before.

I start by using some thin glitter tape at the top and I do this every week just so that top section is a little bit more fun. This tape is either from Wilko or Paperchase because I know I have thin silver tape from both places.

Then at the bottom I used some thicker washi tape from Wilko's and it does go over Wednesday and Sunday a bit but I don't mind as I still have a lot of room left to write plans for the day and if I needed to I could use a post-it.

I always decorate with some stickers and for this spread I used some makeup stickers from Paperchase and I just stick them in random places on the pages. 

I will then use some emoji stickers to mark down anything I know is happening and something that has an emoji. For example I used a book emoji on Sunday for planning next week (I had already used the notebook emoji on something else).

The top section on the left page I use for notes throughout the week and I just write over the 'This Week' putting 'Notes' and I do that with a BIC felt tip which I love.

I will then write down the stuff that I know will be happening and stuff I want to do that day. I use the Papermate InkJoys and the theme for this spread is red and every week it is a different colour and I base these on the BIC felt tip pen colours. 

Then I use some sticky dots from Wilko and these mark of dates and I just put them in the corner of each day. A couple of examples are that the light blue means important and the orange and yellow mean school (I hadn't used any when making this as I hadn't started school as this spread is from August).

I will then choose a postcard from my stash (all are from Paperchase) and I will use that as a blog post to do list throughout the week. Most people probably would have an inspirational quote but I like the jokey postcards as they give me a laugh when I see them and open my planner. 

I will then hole punch it into my planner which can be quite hard but since making this I have bought a single hole punch hopping that will be better.

As I said I use the back of the postcard as a blog to do list and as you can see I can't really write on that so I jazz it up a little and I'm going to show you how I do it.

Firstly I get an A5 size piece of card and trim it to the size of the postcard and stick it down using Pritt stick.

To jazz it up I use some glitter tape (from Wilko) around the edges and I got some more washi tape (from Paperchase) and wrote to do on top of it and it's really simple but looks a lot nicer.


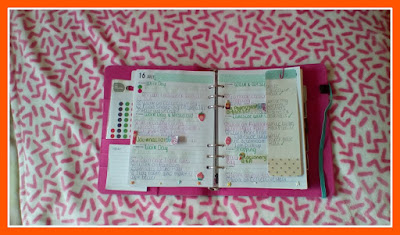
That is the final spread and it's not entirely finished as I hadn't wrote in my plans for all of the week but this is how it looks on a Sunday after planning. I also papercliped in a post it note list of things to organise and this was from the week before but I hadn't organised everything so I just moved it. 

Monday, 24 October 2016

Paperchase Wild Blossom Floral A5 Organiser

Today I'm going to be sharing with you my new planner from Paperchase. These are the original inserts it came with and not the ones I will be using as I will be still using my old A5 set-up from my last A5 which I did a blog post on not too long ago.

This the planner and I love the print so much and because I love the print so much I even bought the backpack with the matching print for my school bag. When I bought this planner it did have 30% off so it was originally £22 but I got it for £15.25. This planner includes an undated diary, meal planner, shopping lists, budget planners, notes and an to-do list pad.

This is what you see when you open the planner. There's no dashboard but I already have one so it doesn't matter. On the left you get 4 card slots which I fit in stickers and it comes with a today to-do list pad and I have a lot of these now but I don't actually use these. On the right is the first divider which is the diary divider.

These are the un-dated diary pages. I'm personally not a fan of undated diaries from Paperchase because they have super small boxes (and I have big handwriting so I can't write much in the box) and they're week on 1 page and I prefer week on 2 pages. 

The next divider is meal planner and this is probably the one that I would use because I need to start tracking my meals again.

These are the meal planner pages. On the side you get every day of the week and at the top there's 4 columns- breakfast, lunch, dinner and snacks. The boxes are quite small so it's not good if you have big handwriting. I'll probably keep these pages in the planner as I do want to track what I eat but I'll fill them out after I've ate.

Next up is the shopping list divider which I probably won't use as I don't really write shopping lists or take my planner out so there's no point writing them down.

These are the shopping lists and I'll probably end up using these as to-do list pages and at the top I'm going to put some washi tape and write to-do over. These are good for to-do's as they have tick boxes and lines (wow Louise!)

Then we come to the Budget Planner divider which I won't be using as I'm not an adult and luckily I don't have to worry about money yet.

These are the budget planner pages and down the side you have 5 sections- Balance, Outlay, Income, Comments and Date and in the middle there's a line separating the sections so you get 2 boxes for each section.

The last section is notes and the section which every planner needs.

I was happy when I saw there was a notes section but was saddened by the notes pages as the pages are squared not lined. I'll probably will end up using these as I don't want to waste paper but squared paper reminds me of school and I don't want to be reminded of school when I'm not there.

That's my new planner. I've already moved into it and I love it. The only problem is the popper is a bit tight and seems like it might come off so I go really gentle because I don't want to break it.

Friday, 30 September 2016

My A5 Planner Set Up

Finally I'm going to be sharing with you whats inside my A5 planner as I mention it a lot but I don't ever really share what's inside so I thought I would should you how I plan and how organise and set up my planner as I'm really happy with it at the moment. Just a warning this is a photo heavy post but I'll try to keep words down to a minimum but I will tell you where things are from; this A5 planner is from Paperchase.  
This is what you see when you first open the planner and in the front pockets I have these Wilko coloured dots stickers, which each colour means a different things like red is important dates. Then I have behind that which you can't see and they're colourful foil stars and in another front pocket I have the Today to-do list pad which comes with the planner but I haven't used it yet but I've kept it in there in case I want to use.

I also have my dashboard thing I made and I stuck some paper on the first card page it comes with then I stuck washi tape round the edge and stuck a neon star in the middle and with alphabet stickers I spelt out my name and I also used some stickers just for extra decoration. 
Paper- Homesense
Washi Tape & Stickers- Paperchase
Neon Star & Alphabet Stickers- Wilko

This planner came with some stickers and I just keep them here in case I want to use them. 

 
My first section is diary and this is the section that I come to the most. I made this divider the same as the first one and the same as all the other ones in this section.

You then get a yearly overview for 2016 and 2017 and at the top of the page I just used some washi tape from Paperchase.

Then you have an important dates section and it goes from July 2016- June 2017 and again I used some tape and this glitter tape is from Wilko.

You then get a year planner and you get a little section to write an important date on each day. I have so far just put stuff like birthdays and Halloween and dates like that.  

I first have some Paperchase inserts which the planner came with but at first I didn't like them so I bought Filofax ones (below) but after using them for like 2 weeks I did like them but I chucked the others away- woops.

These are the Filofax inserts and I got these as they had a notes section which the Paperchase ones didn't have and the spaces for each day is equal as on the Paperchase ones didn't have much room on Saturday and Sunday.

My next section is To-Do and I have my blog to-do list 

On the back of the divider I have a post-it with blog posts I want to do and then on the to-do list I have the order of blog posts and what ones I need to write. 

Next up is school and this was originally meetings but I don't go to meetings so I changed it to what would suit me better.

This originally was meeting notes pages but I stuck some washi tape over the top and just pretend it's notes paper as why would I want to waste paper. 

Next up I have my blog section and even though it says work I don't have a job as I'm in education but I put that because the divider tabs says work so I just put it so it was consistent. 

Inside I just have blog notes and I do decorate these pages because I like having everything in my planner decorated. 

Next we have a notes section.

I did cover up the post-it on the side so you can't read some blog post plans but I have random notes like a list of fun national days (even though I think they're American)

Next up is the buy section

This is just the section where I have shopping lists and I don't take this planner out but if I write it down I'm more likely to remember and then when I come home I see what I bought and tick it off. 

The last section is favourites and this is the divider I don't like as much because I had to use a big neon star as it was the only one left and I think the washi tape is too big but it's fine and I don't see it much. 

In this sections I just have favourites and this is where I plan my monthly favourites or anything favourites related like this notes is my favourites blog posts.

There is a large back pocket but I don't have anything in it but if I do use it I'll use it for loose papers.

This is the back of the planners and there is some marks but they're not that noticeable and I never turn over my planner just to see the planner so it's fine.

That's how I set up my planner and after taking all the pictures for this post I have kinda changed the set up a bit but only by adding in a sticky flag book in the front pocket and having a zip pocket at the back with stickers in.